Bosses
New Bosses
-
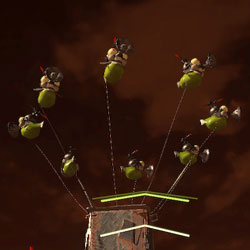
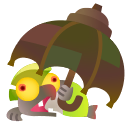
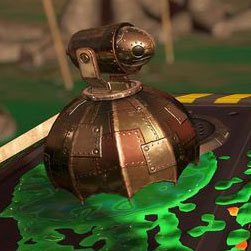
 Big Shot
 -
Fish Stick
-
Flipper Flopper
-
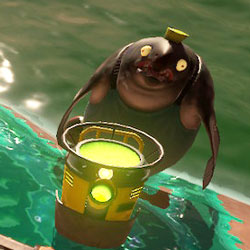
Slammin’ Lid
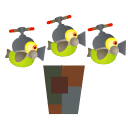
Big Shot
HP: 1200
Strategies:
- Big Shots should be splatted as soon as possible given the damage that stacks against you throughout the wave if ignored. If you see a teammate go alone and the area around the launcher is busy with Salmonids, help them out so you can splat the Big Shots quicker and get back to working on the quota.
- It is often more efficient to go in groups of 2, 3 or 4 to quickly defeat these. Use ‘This Way’ to alert your team a Big Shot has spawned and that you need help.
- Big Shots appear at certain designated spots. Given how far they are away from the basket, it is not ideal to spend too much time staying at the launcher. This can cause bosses to move away from the basket and overwhelm the players at the launcher. It is often wise to splat the Big Shots and head back to the basket quickly. Throwing in a few eggs into the launcher is fine – but don’t stay long enough that you end up splatted.
- If you are at a launcher keep an eye on the timer, quota and if teammates are alive. Launching eggs to teammates who have been splatted is no help.
- If the you don’t have time to splat Big Shots because the egg quota is low, try and help by painting the area around you and teammates so you can easily jump over the shockwaves. Also the further you are from shockwaves the longer the time between shockwaves so they can be easier to jump over and regenerate your health.
- The trouble arises when two or three of these appear and fire cannonballs relentlessly towards the basket. Two shockwaves become four and six pretty quickly and soon the cumulative damage will splat you.
- Slammin’ Lids can OHKO Big Shots.
- Using specials against multiple of these is a quick and efficient way to take out the static boss and head back to the basket.
- A Steelhead explosion will instantly splat any Big Shots nearby
Weapons:
- Given Big Shots huge HP, these can be tough to solo splat if you have a weak or slow moving weapon.
- If you have a slow but powerful weapon, such as the Hydra, consider using higher ground or staying further back to prevent becoming overwhelmed by lessers around the launcher.
- If you have a fast but weaker weapon, such as the Aerospray, consider using specials or taking care of the surrounding enemies first.
- All rollers can cause damage by rolling into the Big Shot by standing in front of it’s path and edging forward slightly. See this demonstration by Hawken
Specials Notes:
- Inkjet is extremely useful – the hits do a lot of damage and the exhaust of the jet can be used for additional damage by hovering over the enemies. It also affords you safety as you can deploy the Inkjet from a safe place.
- Crab Tank can effectively deal with multiple Big Shots should they be there. Its fast firing mode is what you want to use here. Just remember to use it somewhere safe as you’re vulnerable to the spawns around you.
- Killer Wail, Triple Inkstrike, Reef Slider and Booyah Bomb all do substantial damage but not enough to completely take down a Big Shot. Consider using these in tandem with your weapon and consider deploying them if there are multiple Big Shots. Yes they all don’t kill them with the special on their own.
- Wave Breaker does some damage to Big Shots but they prove useful if you have to go alone or there are clusters of lessers around the Big Shots. They also help with revives.
- Charged Kraken attacks are recommended over regular attacks as they deal much more damage.
- Explaining the table below: Very Strong: is for specials that should be prioritised for the particular boss. Useful: Can be used effectively against this particular boss, usually as part of multiple boss splats. Avoid: It is best to use this particular special for other bosses unless it is essential or this special has no effect.
 |
 |
 |
 |
 |
 |
 |
 |
 | |
|---|---|---|---|---|---|---|---|---|---|
Very Strong |  | | | | | ||||
Useful | | | | ||||||
Avoid | |
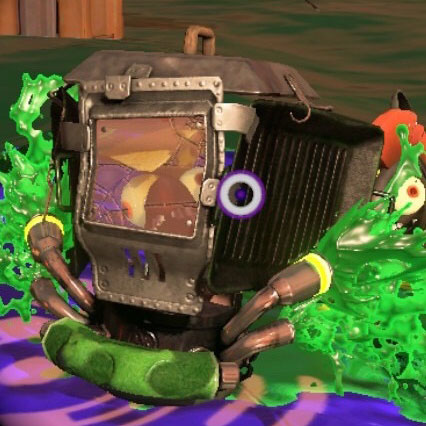
Fish Stick
HP: 32 X 8
Smallfry: 32 per Smallfry
Strategies:
- They have designated landing spots so it is useful to know these spots and if you see any near the basket, try and splat them quickly.
- When multiple Fish Sticks appear they can cause havoc so it is important to splat them quickly, especially on High Tide.
- When defeated, the stick will remain until the end of the wave. This either provides a safe vantage point or an obstacle to move around. Be careful if using a defeated Fish Stick as a safe spot – Maws can climb the stick, Stingers will target you and Flyfish missiles will continue to rain down on you.
- A defeated Fish Stick still counts as ‘active’. This means that fewer will spawn as the wave goes on.
- If you defeat the Fish Stick before it cements its pillar into the ground, the stick will fall apart and de-spawn. This might prove helpful if playing on High Tide where space is limited or using the cannons on Cohock Charge waves.
- Squid Surge is useful to help climb up Fish Sticks if you cannot swim up them because the top isn’t painted (hold the jump button will climbing up).
- If one person has already climbed the stick, leave them to it. As you can body block each others shots and you should be focusing other things.
- A splat bomb on top of the Fish Stick will splat all the Smallfry. But this is very difficult to achieve.
- If a Flyfish is targeting you, do not climb a Fish Stick as you will get splatted while climbing up.
Weapons:
- Fish Sticks can cause problems for heavy and slow weapons as they will be slowed down by the sprinkling of ink around them, leaving them vulnerable to attack from other enemies.
- Long range and mid range weapons can reach them from the ground and don’t even need to climb the stick. This is something to keep in mind as you’re playing as usually they can be defeated quickly and you can move on to the next target. In addition, if you’re a mid-to-long range weapon, consider painting the stick anyway so it’s quicker for your teammates to climb.
- Certain weapons – the Rapid Blaster, Jet Squelcher and Hydra, for example – can quickly splat Fish Sticks before they land.
- Short range weapons – such as brushes and shooters – will have to climb the stick to shoot the Smallfry. Short range weapons usually have the mobility to do this and can get this done quickly.
- For Rollers it is easier to use the vertical flick to paint the Fish Stick and the horizontal flick to splat the Smallfry.
- Sloshers can be great against Fish Sticks if you flick sideways for multiple hits. Check out this Slosher Guide by Hazmy
Specials Notes:
- Triple Inkstrike is one of the best specials to counter these, especially if there are more than one active Fish Stick on the field. They can be aimed and at the stick which will cause all of the Smallfry to get caught in the radius of the strike.
- Crab Tank is incredibly useful against Fish Sticks if you shoot on top of the totem, it one shots the whole batch. See this demonstration by Brian
- Inkjet also proves useful against these – given the right angle, you’re able to one shot these see this demonstration by CheWoomy. Aim for the top of the stick, directly in the middle. Failing that, they can be taken out by two inkjet shots when aiming directly at the Smallfry due to the radius of the explosions.
- Booyah Bomb can also be useful at splatting Fish Sticks in conjunction with other other bosses and lessers if needed.
- Explaining the table below: Very Strong: is for specials that should be prioritised for the particular boss. Useful: Can be used effectively against this particular boss, usually as part of multiple boss splats. Avoid: It is best to use this particular special for other bosses unless it is essential or this special has no effect.
|
|
|
|
|
|
|
|
|
| |
|---|---|---|---|---|---|---|---|---|---|
Very Strong | | ||||||||
Useful | | | | ||||||
Avoid |
|
| | | |
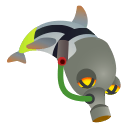
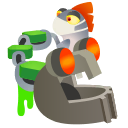
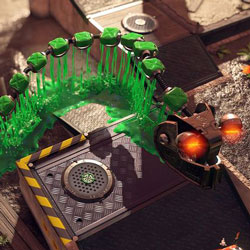
Flipper Flopper
HP: 1200
Recoil: 300HP after recoil
Strategies:
- Flipper Floppers can be lured. So if you can bring these closer to basket, especially if quota is low and you have a weapon that paints well then it can be very useful.
- If you attack the Flipper Flopper but don’t splat it within its attack cycle, it still retains its damage and you can continue to attack above you before it hits the ground. Splatting the Flipper Flopper before it attacks renders its turf below void.
- One of these can be harmless but two or more of these around a basket area in conjunction with other bosses can cause big problems, especially towards the end of a wave and for slow, heavy weapons.
- If other bosses are splatted within the Flipper Flopper circle the ink explosion from the splat will either help paint the circle or paint it fully. For example if a Maws was inside the Flipper Flopper circle, use a splat bomb to splat the Maws and it will paint the circle for you, giving you a 2 for 1.
- Don’t forget that you can use splat bombs to help paint the circle which is useful if your main weapon doesn’t turf well.
- If a Flipper Flopper circle is placed over multiple surfaces and/or surfaces that aren’t inkable then the amount that needs to be painted becomes reduced so it is easier to paint.
Weapons:
- Weapons that paint fast and well – most shooters, sloshers, brushes etc – can cover the area of attack quickly so that the falling fish smashes into your ink and takes heavy damage. After this, it requires some extra damage to be finished off. If you have a fast weapon that paints well, paint the area even if you can’t splat the boss.
- Weapons such as blasters, chargers and some rollers may struggle with movement and turfing around these bosses and will largely depend on their teammates to assist with turfing the area of attack.
- Rollers can roll to damage or splat a weakened Flipper Flopper after it has submerged into it’s own ink and begins to peek for it’s next jump.
- Certain weapons – the Hydra and E-Liter – can splat the Flipper Flopper before it attacks on the first cycle due to the power of the weapons. It takes two fully charged E-liter shots to splat it when it’s at full health.
- Grizzco Splatana can OHKO a Flipper Flopper with a charged shot while it is in mid-air.
Specials Notes:
- Flipper Floppers are weak enemies so all specials can be useful against these. Booyah Bomb and Triple Inkstrike can damage these in the air before they attack.
- Reef Slider can take them out when they’re on the ground.
- Killer Wail can target them wherever they are in their attack cycle
- However even with all the above, you probably don’t want to be using any specials on these unless it is in conjunction with splatting other bosses or there is a snowball of bosses and you need to splat them for basket relief or to meet the quota.
- Explaining the table below: Very Strong: is for specials that should be prioritised for the particular boss. Useful: Can be used effectively against this particular boss, usually as part of multiple boss splats. Avoid: It is best to use this particular special for other bosses unless it is essential or this special has no effect.
|
|
|
|
|
|
|
|
|
| |
|---|---|---|---|---|---|---|---|---|---|
Very Strong | |||||||||
Useful | | | | ||||||
Avoid | | |
|
| | |

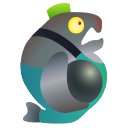
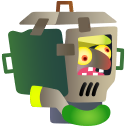
Slammin' Lid
HP: 500
Strategies:
- Whilst you may want to get rid of these quickly to prevent overcrowding of lessers, keeping these alive may prove useful for a short while. When they attack and slam down, they crush everything underneath it. It takes out attacking and non-attacking bosses, most notably Steelheads, with one fell swoop. It can OHKO nearly every boss or does a large amount of damage.
- Riding the top of the Slammin’ Lid can also be useful – for traversing the map, escaping pressure and for targeting other bosses. Be careful though! Maws will continue to be after you, Flyfish missiles will continue to target you and the little Salmonid that pilots the Lid will attack you with a ladle if you overstay your welcome.
- Slammin’ Lids deal damage when they are defeated: they will do enough damage to any Smallfry, Chum, Cohocks and Flyfish underneath them and do residual damage to other enemy bosses.
- If a Steel Eel is travelling through a Slammin’ Lid you can time the triggering of the Lid to slam when the Eel’s tail is below the lid for an instant splat.
- Possible to throw Splat Bombs on top to deal damage. The Slammin’ Lid barrier can be used to splat Flyfish by throwing a bomb if a Flyfish is near. It’s difficult but useful if it can be achieved. See Gungee’s demonstration
- If a teammate is on top of a fallen Slammin Lid’ and there are other enemies surrounding them, do not help them splat the Slammin Lid’ as it’s safer for them to let the Lid go back up to it’s usual stance so your teammate is safe and they can splat it themselves. They can use the damage of the defeated Slammin’ Lid to help deal with lessers below it.
- If Slammin’ Lids have stopped on a narrow path and you can’t get to them. Try and back up a little so they come closer or if that is not possible and too much time is going to be wasted, use a special. They can really stall narrow paths and need to be dealt with swiftly.
- If some of the Slammin’ Lid’s green barrier is on an elevated platform and you activate it, the lid will fall at an angle instead of flat. This sometimes means you aren’t able to jump on top of the lid because of the awkward angle it fell at. So you may have to activate it from the elevated area as you have more height to jump on top of it.
- It can be lured by moving away from it as it spawns and it will follow you closer to the basket. You can also reset Lids to lure them once they are set by triggering their slam and moving away. Check out this Guide by Hazmy
- Before the Lid slams down, it’ll make a noise/alarm and its green barrier will flicker.
- Squid Roll is a useful mechanic to trigger the Slammin’ Lid.
Weapons:
- Almost all weapons can deal with these, as the pilot atop the Lid doesn’t require too much damage. Dualies can easily roll in and out to trigger them and brushes/rollers can quickly brush/roll in and out too.
- Long range weapons like chargers can effectively snipe from a distance whilst your short ranged weapons can activate its attack and kill it quickly.
- During Cohock Charge (cannons wave), these will block all shots fired from cannons. It can cause a pile up of bosses and Cohocks. It’s worth taking these out asap during this wave to ensure movement and freedom with the cannons.
- The Lid’s barrier will instantly break any brella shields that come in contact with it. Be careful when shooting with Undercover or deploying with other brellas.
Specials Notes:
- Booyah Bomb and Triple Inkstrike seem like the most useful here on account of them being able to be deployed anywhere you can reach.
- If you have a high vantage point and are using Crab Tank it can easily splat Slammin Lids.
- Explaining the table below: Very Strong: is for specials that should be prioritised for the particular boss. Useful: Can be used effectively against this particular boss, usually as part of multiple boss splats. Avoid: It is best to use this particular special for other bosses unless it is essential or this special has no effect.
|
|
|
|
|
|
|
|
|
| |
|---|---|---|---|---|---|---|---|---|---|
Very Strong | |||||||||
Useful | | | | ||||||
Avoid | | | | | | |
Other Bosses
-
Drizzler
-
Flyfish
-
Maws
-
Scrapper
-
Steel Eel
-
Steelhead
-
Stinger


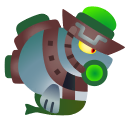

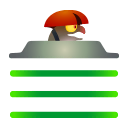
Drizzler
HP: 900
Damage: 18 per second
Strategies:
- You can lure Drizzlers to basket or close to the basket if no players are within range for it to settle. If you see a Drizzler spawn and nobody is near it, stay back and try and get it close to the basket if possible.
- Try and anticipate the Drizzler torpedo so you can shoot the torpedo and splat the Drizzler quicker. However it’s not always possible to get the torpedo splat so in that case shoot the torpedo and then shoot the vulnerable Drizzler.
- It is possible to shoot a Drizzler torpedo and splat a different Drizzler with that torpedo if aimed correctly.
- If you are close to a Drizzler that is targeting you and your aim is to shoot the Drizzler directly instead of shooting the torpedo make the Drizzler face away from the basket or your teammates so the rain goes in a direction that won’t hinder the objective.
- It is useful to shoot at a Drizzler in mid-air while it is moving to it’s landing spot to make it easier to splat when it opens.
- Drizzler torpedoes can splat Flyfish baskets if shot down and aimed perfectly. See this demonstration by Essie
Weapons:
- For short range weapons it can be difficult to reach the torpedoes therefore it may be best to wait for the Drizzler to open and shoot it directly to splat it in one cycle.
- Long range weapons should be aware of Drizzler torpedoes that have not been shot down and take this responsibility.
- Rollers and Tenta Brella have tricks to either Roll on Drizzlers or Shoot the Canopy against Drizzlers for additional damage and they are quite strong.
- Grizzco Slosher can splat a Drizzler even when it is closed.
- Grizzco Splatana can OHKO a Drizzler with a charged shot whether it is open or closed.
Specials Notes:
- Killer Wail, Booyah Bomb & Triple Inkstrike can all pierce through the Drizzler armor but you may need to do additional damage with your main weapon to KO the Drizzler.
- Inkjet and Crab Tank are powerful specials that can be used against Drizzlers. But these specials would be more optimised to be used against static bosses or crowd control.
- Reef Slider and Wave Breaker can be useful to add damage to an open Drizzler and crowd control if used within its vicinity.
- All the Specials can be used to splat Drizzlers however to maximise your special usage you should try and splat Drizzlers along with other higher priority bosses. With this in mind we have marked most of the specials as Useful if the Drizzler is part of multiple boss splats.
- Explaining the table below: Very Strong: is for specials that should be prioritised for the particular boss. Useful: Can be used effectively against this particular boss, usually as part of multiple boss splats. Avoid: It is best to use this particular special for other bosses unless it is essential or this special has no effect.
|
|
|
|
|
|
|
| |
|---|---|---|---|---|---|---|---|
Very Strong | |||||||
Useful | | | | | | | |
Avoid |
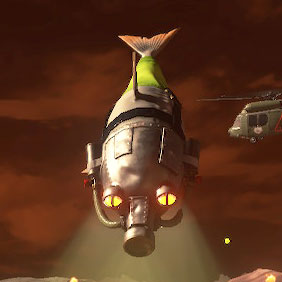
Flyfish
HP: 360
Damage: 150 / 50 / 30 / 15 (depending on distance from missiles)
Strategies:
- Flyfish is a high priority boss, they can cause major problem, especially if there is more than one on the field. If multiple Flyfish do spawn and you have a special capable of dealing with them quickly, it is often wise to do this if quota is looking tricky and other bosses are piling up.
- There are two options with Flyfish either throw 2 bombs and splat the Flyfish or cripple the Flyfish with 1 bomb. By crippling it another one will not spawn in that same spot. However we recommend splatting Flyfish as soon as possible, missiles can still be a major problem especially with multiple crippled Flyfish.
- The left Flyfish launcher targets the closest player and the right one targets a random player. If you are going for a Flyfish alone, splat the left Flyfish launcher first so it won’t target you while you re-charge your ink to splat the second launcher.
- If missiles are targeting you, move slowly in the ink as this will help reduce the damage spread that may get teammates splatted. Also try to avoid bringing missiles to basket as this can splat teammates and reduce egg running.
- If a Flyfish is next to a Stinger splat the launcher that is closest to the Stinger and it will damage the Stinger, making the Stinger easier to splat.
- While Flyfish are mobile they can turn based on the closest player’s movement. Be aware of them and try to avoid turning the Flyfish away from your teammates.
- While waiting for a Flyfish to open, reveal yourself in kid mode and line yourself with a Flyfish launcher. By doing this other teammates will most likely aim for the other launcher. So you don’t both throw bombs in the same launcher. You can also be a little patient and let others throw their bombs first and then throw yours to ensure the Flyfish is splatted.
- If players are splatted, you can have multiple Flyfish target you with missiles. Be careful where you move and ink as you survive and revive your team.
- In certain cases it is possible to splat Flyfish with a single Splat Bomb when they are close to a ledge. See some examples by CheWoomy
Weapons:
- As Flyfish require splat bombs to be splatted any weapon type can do this. However if the path to a Flyfish is busy, weapons with high DPS and mobility are better options to go out and target Flyfish.
- The Explosher can splat the Flyfish launchers with it sploshes, this is very useful and saves other players using a lot of ink with splat bombs.
- Brella shields can help protect you and teammates who are nearby from Flyfish missile damage.
- Grizzco slosher can splat a Flyfish with one slosh if aimed at the pilot in the middle of a Flyfish.
- Grizzco Splatana can also OHKO a Flyfish by aiming for the cockpit with a charged shot.
- Explosher and the Egg Cannon can one shot a Flyfish by aiming at a precise joint above the cockpit in between the lids or splat the baskets individually.
Specials Notes:
- Inkjet & Crab Tank: Can one shot Flyfish by aiming at a precise point above the cockpit in between the lids. If unable, you can individually shoot the launchers. These specials are ideal for taking out multiple Flyfish. For Crab Tank you must use the charged shot rather than the turret.
- Booyah Bomb & Triple Inkstrike: These can be directly thrown and placed on to Flyfish, just remember to aim towards the cockpit in between the lids. They are usually destroyed by these specials.
- Killer Wail: Aim directly at the Flyfish to have them taken out by the Wail. You can line up 2-3 Flyfish with one Wail.
- Reef-Slider: A niche use, but if you position yourself above a Flyfish, you can use the Reef Slider to explode on the Flyfish to take them out.
- Explaining the table below: Very Strong: is for specials that should be prioritised for the particular boss. Useful: Can be used effectively against this particular boss, usually as part of multiple boss splats. Avoid: It is best to use this particular special for other bosses unless it is essential or this special has no effect.
|
|
|
|
|
|
|
|
|
| |
|---|---|---|---|---|---|---|---|---|---|
Very Strong | | | | | | | |||
Useful | | ||||||||
Avoid |
| |
Maws
HP: 1200
Damage: N/A
Strategies:
- Maws should be lured to basket as much as possible as they move fast and cause very little delay.
- Best to use a splat bomb to splat the Maws. You can throw a bomb in mid-air in anticipation of the Maws revealing itself and if your timing is correct you can splat the Maws. Helpful when there may be lessers blocking a direct roll of the bomb or you are a distance away.
- If a Maws is targeting another player and it pops up but is not splatted you can get close to the Maws and it will target you, now lure it to the basket.
Weapons:
- If you have a weapon that does not ink your feet well or requires a charge be wary of getting stuck in ink under a Maws and getting splatted. Using Splat Hopping or Sub Strafing could help.
- If you have a high DPS weapons you can shoot at the Maws to splat it especially if there is more than one of you using this strategy, however it is usually faster to use a splat bomb.
- You can deal roll damage to a Maws with the Dynamo Roller with 3 hits being enough for the splat. There if you are pushed up against a wall with your roller and the Maws shows itself it can be splatted. See Hawken’s demonstration of using the Big Shot cannon as a “wall” to help splat the Maws from above it.
- Grizzco Splatana and Stringer can OHKO Maws with a charged shot at close range.
Specials Notes:
- Booyah Bomb, Killer Wail, and Wave Breaker can damage the Maws when it’s traveling in ink.
- Inkjet and Crab Tank can damage Maws when it’s above ground, but these specials should be used on other priorities.
- Reef Slider can damage Maws when it’s above ground. Good to use when there are other nearby enemies at the point of impact.
- All the Specials can be used to damage/splat Maws however your specials are better served on other bosses unless a Maws splat is desperately required for eggs or it is splatted along with other higher priority bosses. With this in mind we have marked all the specials as Avoid
- Explaining the table below: Very Strong: is for specials that should be prioritised for the particular boss. Useful: Can be used effectively against this particular boss, usually as part of multiple boss splats. Avoid: It is best to use this particular special for other bosses unless it is essential or this special has no effect.
|
|
|
|
|
|
|
|
|
| |
|---|---|---|---|---|---|---|---|---|---|
Very Strong | |||||||||
Useful | |||||||||
Avoid |
| | |
|
|
| | | |
Scrapper
HP: Front 600, Rear 500
Damage: 30
Strategies:
- Scrappers should be lured close to basket as much as possible as they move fast and don’t cause too much damage so it’s usually easy to splat and deposit the eggs from them.
- If a Scrapper is targeting another player you can either bump or shoot it and it will target you, this is very useful to get easy eggs closer to basket.
- It is useful to slightly stun the scrapper so the rear is facing your teammates who can then splat the Scrapper especially if they have high DPS weapons. You can also do a full stun so you or other players have more time to splat the Scrapper.
- If there are more than one Scrappers getting close to basket be wary of how you stun them so the rear ends are able be to shot at and time is not wasted. Do not stun them on narrow areas like doorways or grates because you cannot get to the rear and splat them.
Weapons:
- High DPS weapons should prioritise splatting Scrappers. Weapons such as Inkbrush, Sloshers and some Rollers require much more time and effort.
- Dynamo Roller can splat the Scrapper if you roll the rear end so positioning and anticipation with this weapon is important. Chargers are also very effective especially the E-Liter.
- Grizzco slosher can splat a Scrapper with 2 sloshes even when facing the front end of the Scrapper.
- Grizzco Splatana can OHKO Scrappers with a charged shot through their armour.
Specials Notes:
- Booyah Bomb: Effective at splatting Scrappers. Attempt to combine multiple Scrappers and other bosses with the Booyah Bomb to get the most out of it.
- Triple Inkstrike: Works similarly to Booyah Bomb but not as powerful. Combine multiple bosses together and use in tandem with main weapon or bombs.
- Killer Wail: Able to effectively stun and destroy Scrappers. Can be used in a pinch or can be lined up with other bosses for maximum damage.
- Reef Slider: Scrappers will be destroyed by the Reef Slider if exposed side is in the blast radius.
- Wave Breaker: Will inflict damage with every wave. Useful if struggling to manage multiple around basket as they can stun Scrappers and assist with damage.
- Explaining the table below: Very Strong: is for specials that should be prioritised for the particular boss. Useful: Can be used effectively against this particular boss, usually as part of multiple boss splats. Avoid: It is best to use this particular special for other bosses unless it is essential or this special has no effect.
|
|
|
|
|
|
|
|
|
| |
|---|---|---|---|---|---|---|---|---|---|
Very Strong | | | |||||||
Useful | | |
| |
|
| |||
Avoid |
|
Steel Eel
HP: 500
Damage: 50
Strategies:
- Steels Eels move quite fast so this is usually an easy lure close to basket if there aren’t many other Salmonid around.
- When a Steel Eel spawns, it will target the closest player at it’s spawn point. Note that the spawn can occur under water. Look at the tail driver to see who it is staring at, that person is the target. If you are the target, then it may be best to stay at basket or splat the Steel Eel.
- If there is more than one Steel Eel getting close to the basket, you want to splat them earlier to avoid crowding the basket area and causing a snowball effect.
- Any small touch from the Steel Eel body causes 50 damage, so be aware of who the Steel Eel is targeting and anticipate its movement.
- If you are waiting a Steel Eel you can throw bombs towards the tail so it can be splatted quicker by weakening the tail. Throwing a bomb on the Steel Eel’s body results in an immediate explosion, which can be useful for damaging other enemies.
- When a Steel Eel is splatted, there is an animation that starts from the tail and ends at the head. So a player can still be damaged during the Steel Eels death animation.
- Be aware that Steel Eels can drop from short ledges like on Sockeye, Fission, and Grounds near the basket. Don’t relax until you’re fully out of range.
Weapons:
- Long range weapons should try and prioritise Steel Eel’s if they have the high ground and have a good angle to splat the Steel Eels as it may take other weapons longer to make their way to the tail if there are other bosses and lesser blocking their path.
- Dynamo Roller can splat the Steel Eel if you roll the tail so positioning and anticipation with this weapon is important. Chargers are also very effective especially the E-Liter.
- Grizzco slosher can pierce through a Steel Eel and splat the tail which can be useful when it is difficult to reach the tail.
Specials Notes:
- Inkjet and Crab Tank’s are very useful against Steel Eels, especially when there are multiple at the basket. Note that the Steel Eel head is tall enough to damage you whilst using Inkjet.
- Wave Breaker, Killer Wail, Reef Slider, Triple Inkstrike and Booyah Bomb are all very effective as well, especially when the basket is overcrowded. Note that Reef Slider can slide through a Steel Eel but make sure you activate it when you clear the body. Otherwise, you’ll be splatted.
- Kraken and Splashdown can OHKO an Eel if you hit the tail correctly however both specials need the tail to be easily accessible. Kraken can get bumped around by the body of the Eel and splashdown can have no effect if the tail is not exposed.
- Explaining the table below: Very Strong: is for specials that should be prioritised for the particular boss. Useful: Can be used effectively against this particular boss, usually as part of multiple boss splats. Avoid: It is best to use this particular special for other bosses unless it is essential or this special has no effect.
|
|
|
|
|
|
|
|
|
| |
|---|---|---|---|---|---|---|---|---|---|
Very Strong | | | |||||||
Useful | |
|
| | |
|
| ||
Avoid |

Steelhead
HP: 300: Bomb
Damage: 180 / 80 / 30 (depending on distance from explosion)
Strategies:
- Early on, if there aren’t many bosses and lessers around you can allow Steelheads to come closer to the basket and splat them.
- If there are many bosses and lessers around then it may be best to splat the Steelhead early instead of luring and ignore the eggs until the basket area is safe.
- Steelheads will not activate if you are above them. If you see a Steelhead looking up and moving that means it is targeting someone on higher ground. If you move close the Steelhead it will target you can get the splat.
- When splatting a Steelhead the explosion causes damage around it which can be useful for clearing lessers or other bosses within the radius. One strategy is to stun or pause a Scrapper in front of a Steelhead, once the Steelhead is splatted the Scrapper will also get splatted due to the explosion. This can also work for other bosses that may be in the explosion radius so sometimes it can be useful to time your Steelhead splat to get better value.
- During a Cohock Charge wave, cannon users can splat a Steelhead by aiming at it’s body while the Steelhead bomb is activated.
Weapons:
- Long range weapons such as a Charger or Splatling should be aware of Steelheads and take responsibility for splatting them if they are near the basket area.
- Short range weapons such as Sploosh and Inkbrush struggle to reach a Steelhead bomb so you may have to rely on teammates to help splat Steelheads or get the high ground so you have some height to reach the Steelhead bomb.
- Weapons such as Jet Squelcher and Rapid Blasters can one cycle a Steelhead if timed correctly, however this can be difficult if there are many Salmonid around. So as a teammate if you see this, help the players using those weapons to splat the Steelhead in one cycle.
- Brella shields can help protect you and teammates who are nearby from a Steelhead explosion.
- Grizzco slosher can one hit splat a Steelhead with one shot if aimed at the exposed bomb. It can also be splatted with 2 sloshes into the body of a Steelhead.
- Grizzco Splatana can splat a Steelhead with a charged shot even if it’s bomb is not activated..
Specials Notes:
- Inkjet: The most effective counter as they have the height and power to be able to one-shot them. Consider deploying this special if there are multiple around basket or you have a main weapon that doesn’t have enough range to manage them.
- Booyah Bomb: Splats a Steelhead on impact.
- Triple Inkstrike: Not powerful enough to shred through their outer body but effective against Steelheads during their attack cycle.
- Killer Wail: Can be used to defeat Steelheads as they will pierce through their outer body.
- Reef Slider: Time your explosion correctly and it will take out Steelheads that are in their attack cycle. Useful if you have a weapon that cannot effectively defeat them or if you cannot reach them (Reef Slider passes through enemies).
- Kraken: Can pierce through the body of Steelheads using the charged attack for a OHKO. It can pierce through multiple of these bosses if they are lined up correctly and close together.
- Explaining the table below: Very Strong: is for specials that should be prioritised for the particular boss. Useful: Can be used effectively against this particular boss, usually as part of multiple boss splats. Avoid: It is best to use this particular special for other bosses unless it is essential or this special has no effect.
|
|
|
|
|
|
|
|
|
| |
|---|---|---|---|---|---|---|---|---|---|
Very Strong | | | | | |||||
Useful | | | |||||||
Avoid |
|
| |
Stinger
HP: 60 per pot
Damage: 1 per frame
Strategies:
- Usually important to splat Stingers early especially if there are more than one.
- Stingers target the furthest player after their attack cycle so you can use this to your advantage and have one or more stingers target you and dodge the lasers, allowing a teammate to easily splat them. However only do this if you see a teammate actively going to splat them. Alternatively, if they are targeting teammates, this is a great time to go out and splat them safely.
- In some cases it is best to splat the Stinger and ignore the eggs if there are other bosses or lessers blocking your path. Staying alive here is important because if you are splatted it could be a long path back towards the basket to get revived.
- When quota is becoming a problem and there is one Stinger on the map it can be ignored to focus on the quota. Avoiding one Stinger is not too difficult. If you have a mobile weapon in squad games, consider taking the aggro to help your teammates. But if you’re in Freelance, do your best to not take aggro since you can be more effective at running eggs. Do your best to stay alive at basket.
- If a Steelhead and Stinger spawn next to each other, you can splat the Steelhead first and the explosion can clear lessers and damage the Stinger. Same can be said for Slammin’ Lid stopping on top of a Stinger, though you may have to take out additional Stinger pots after the Slammin’ Lid attack.
Weapons:
- High DPS weapons should prioritise splatting Stingers as weapons such as Sloshers and Chargers require much more time and effort so only go for Stingers if you have a clear path and time.
- All rollers can roll Stingers which is very useful if you are forced to go out to splat a Stinger that you identified before your teammates or they are not interesting in dealing with it. See Reyko’s demonstration and for a more in-depth explanation of this strategy check out this Guide by Hazmy
- Blasters and sloshing machine can splat Stingers in one shot by aiming at the center pot (except Clash and Grizzco Blasters).
- Grizzco slosher can splat a Stinger with one shot if aimed at the head. See Inkling Raven’s demonstration
Specials Notes:
- Inkjet and Crab Tank are very effective at taking out Stingers. You should target the middle of the Stinger. Crab Tank may need to use Turret mode to finish off the Stinger.
- Booyah Bomb, Triple Inkstrike and Killer Wail are very effective at splatting Stingers when you are far from them.
- Reef Slider will OHKO Stingers but it may best to only use when you have low ink or are surrounded by enemies. Consider also using this special if you have a weapon that isn’t best equipped to take out Stingers efficiently.
- Wave Breaker does take out the pots on the ground but this would be better used to help clear the area around the Stinger, rather than for the Stinger itself
- Explaining the table below: Very Strong: is for specials that should be prioritised for the particular boss. Useful: Can be used effectively against this particular boss, usually as part of multiple boss splats. Avoid: It is best to use this particular special for other bosses unless it is essential or this special has no effect.
|
|
|
|
|
|
|
|
|
| |
|---|---|---|---|---|---|---|---|---|---|
Very Strong | | | | | | | | ||
Useful | | ||||||||
Avoid | |
Manage Cookie Consent
To provide the best experiences, we use technologies like cookies to store and/or access device information. Consenting to these technologies will allow us to process data such as browsing behaviour or unique IDs on this site. Not consenting or withdrawing consent, may adversely affect certain features and functions.
Functional Always active
The technical storage or access is strictly necessary for the legitimate purpose of enabling the use of a specific service explicitly requested by the subscriber or user, or for the sole purpose of carrying out the transmission of a communication over an electronic communications network.
Preferences
The technical storage or access is necessary for the legitimate purpose of storing preferences that are not requested by the subscriber or user.
Statistics
The technical storage or access that is used exclusively for statistical purposes.
The technical storage or access that is used exclusively for anonymous statistical purposes. Without a subpoena, voluntary compliance on the part of your Internet Service Provider, or additional records from a third party, information stored or retrieved for this purpose alone cannot usually be used to identify you.
Marketing
The technical storage or access is required to create user profiles to send advertising, or to track the user on a website or across several websites for similar marketing purposes.