Spawning Grounds
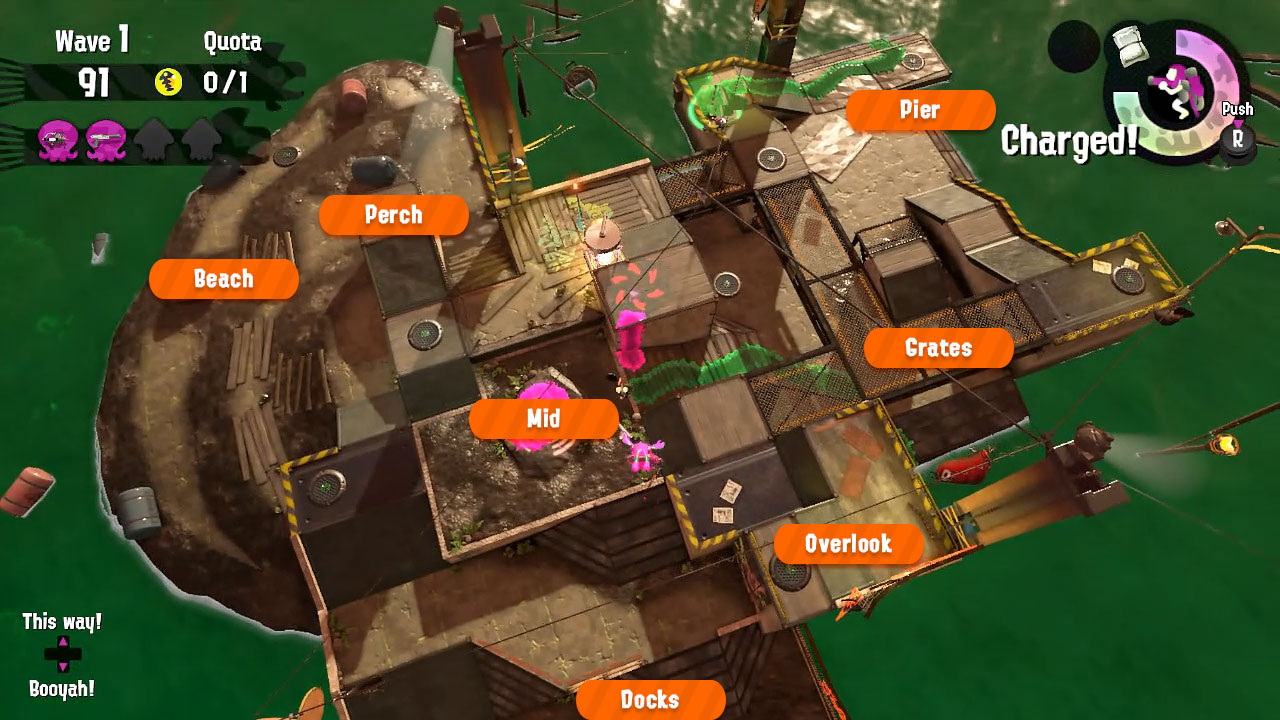


Normal Tide
Map Specific
- Start by painting the area around the basket. Use the first few seconds before the basket appears to paint there with no obstructions. Then paint the tall walls of the basket platform – these walls are extremely important for navigating the stage easily and also in the case you have to play a special wave. Useful Spawning Grounds tips from Rachelski
- At the start of the wave stay back and stand near the basket. If the first boss spawn is a Drizzler from the docks move towards the grates behind the basket and it’s possible to get the Drizzler to jump to the basket. As it approaches for the final jump try and shoot it while it’s in the air. If Drizzlers spawn to the left or right side you can move to the opposite side and they will jump close to or right next to the basket, depending on how far back you moved.
- When Stingers spawn at the docks and quota is not close to being met it may be best to use Killer Wail to splat them early as it can take a long time to splat the Stingers and return to the basket.
- When at the docks it is possible to jump from the left dock to the middle dock which can be useful to escape death or splat Stingers. It’s also possible to jump through the fences at the docks and shoot through them which can be used to get a better angle if the entrance route is blocked.
- If a Flyfish spawns from the beach at the edge of the platform it is possible to throw a bomb from the basket side into the closest Flyfish launcher. See Blizz’s demonstration
- If a Flyfish spawns from the pier and moves closer to the basket on its second cycle, it is possible to throw bombs from the basket platform that will reach the Flyfish launchers.
General Tips
- Always paint walls and areas around the basket before the wave starts.
- If mobile bosses spawn at the beginning you can throw bombs or shoot lessers from a distance with long range weapons while you wait for them to get closer to basket.
- Stalling bosses far away and quota management should be monitored closely. If teammates are stalling bosses either help them splat the bosses to get back to the objective or if there are other bosses from another side use this time to lure and splat them close to basket. With more experience your decision making will improve in these situations and it will be reflected in winning games that previously may have been lost.
- If quota isn’t met with 20-30 seconds left, you should try and prioritise bosses closer to basket and avoid static bosses. Your help is needed at the basket. Instead, use a far ranging special (Killer Wail, Booyah Bomb etc) to take care of the static bosses that are causing disruptions.
Avoid
- Avoid spending too much time on the far ends of the map. Only use this area to escape if the basket side is overrun or return to the basket area after splatting Stingers, Flyfish or Big Shots.
- If teammates are stalling bosses far away and there is no opportunity to lure them, help your teammates splat the bosses and avoid being inactive or spamming “This Way!”.
- Don’t all bunch together in one area as you may miss lures or risk a snowball from the opposite side.
High Tide
Map Specific
- Paint the basket platform walls facing the docks area. You can jump over the water in the gap and easily reach the basket without having to go around if you’re blocked.
- If a Stinger or Flyfish spawn in the furthest grates area on the left it can be a good strategy to Killer Wail them early. It can take a while to go there and it’s risky if other Salmonids block you. If it is possible to make it to that area safely for a Flyfish or Stinger, splat them quick and if the eggs are risky leave them and come back to the basket.
- Due to the small size of this High Tide map, every single boss next to the basket is a high priority target for many reasons. Luring is pointless unless the spawns happen on the grates.
- As the platform next to the basket is very useful for giving elevation and allowing players to splat bosses at range. However, it can also become a death trap if too many players are in this area and there are multiple Flyfish. Be wary of getting too bunched up in this small area. Using the perch or grates area for some relief can be wise.
- If a Flyfish spawns on the furthest part of the map on the right, it is possible to jump from the basket platform and throw a bomb into a launcher.
- If Steelheads or Steel Eels are spawning from the grates and you have a long range weapon it may be best to splat them early while they are at grates so they don’t cause problems at the basket.
- If your teammates get wiped it can be a wise decision to go to the overlook as bosses take a little longer to climb up here and you can charge your ink for a bomb throw or jump from overlook straight into the mid area to regroup.
- Make sure to take down the Flyfish next to the basket. Other bosses will seem easier to take down in comparison, but their eggs are within reach as well and they are too dangerous on such a small stage.
- Drizzlers may go under the radar with all the other bosses on the stage but are also dangerous. However, since one of the Drizzler landings is right next to the basket they can also be a valuable asset to build the quota. Keep an eye on torpedoes and try to get the instant splats. If you’re the target try to make the Drizzler fire them away from the stage.
General Tips
- Listen for the sounds of the tides changing so you don’t get splatted to the rise of the tide.
- Luring can be a lot more difficult and unnecessary in most cases, so prioritising slaying can be helpful to avoid snowballing.
- High Tide can be more hectic than other tides. You want to remain mobile and be constantly splatting bosses and turfing.
- Specials are important on this wave type as it can snowball very quickly.
Avoid
- Do not group up at the basket for long periods. If there are Flyfish on the field that small area will get overwhelmed quickly and can result in multiple teammates getting splatted.
Low Tide
Map Specific
- To begin the wave paint the hill, basket area and three paths then back up to see if a Drizzler is the first spawn and you can move to the opposite direction to let it come to the basket.
- You may only need to go to the far reaches of the map for Stingers, Big Shots or Flyfish. Everything else can and should be lured closer to the basket (at the very least past the narrow pathways). Of course, don’t force lures if your teammates stop bosses early and try to assist them.
- There is one landing point for Drizzlers right next to the basket. If you see a Drizzler spawn it can be a good idea to move in the opposite direction away from the basket and allow it to jump there.
- This layout is flat so do not approach Steelheads carelessly either. They could also block access to stationary bosses. Especially as a short weapon that can’t easily hit the bomb. Let long range weapons engage Steelheads once they’re past the narrow pathways.
- From the furthest points of the map it can take a long time to reach each side especially when Stingers spawn, if you are able to splat them the eggs may be better left ignored if the area is not safe. It can save time to splat Stingers, Big Shots or Flyfish with specials.
- If the basket area gets overwhelmed use the hill area to your advantage for relief and long range weapons can splat bosses from here. It can also be helpful to use the hill to lure Steel Eels so when their tail is near the basket area teammates can splat it and collect eggs.
- When positioned at the bottom of the left or middle lanes it is possible to splat bosses with long range weapons. For example if a Stinger spawns in the left lane but the path is busy but the middle lane is clear. Swim to the bottom of the middle lane and use your weapon’s range to splat the Stinger from here, this works vice versa also.
General Tips
- If you need relief or want the Stingers to target you so teammates can take them out safely, use the back of the map if required.
- If static bosses spawn at the bottom of the map and they are difficult to reach and quota is struggling to be met, if you have Killer Wail, Inkjet, Crab Tank, Booyah Bomb or Triple Inkstrike you can easily splat these bosses from a distance and get back to basket to help with quota.
- If going after static bosses, always plan an escape route so you won’t be trapped
Avoid
- Avoid spending too much time at the far ends of the map. If you splat Stingers here and the eggs look risky it is often best to ignore them and get back to the basket area. If you get splatted here it takes a long time to get back.
- Steelheads can be troublesome if they are allowed to throw bombs at the basket after approaching from the water. Long range weapons should not ignore Steelheads.
- Do not stun Scrappers on narrow paths as it can be very difficult to splat them, be patient and let them come towards the basket area first.
- Slammin’ Lids can be block narrow paths so if you are able to splat them early, be sure to do so.
Goldie Seeking
Map Specific
- There have been some changes in the gusher connections for Splatoon 3. A and D are no longer connected and now A and I are connected so the logic is slightly different now.
Normal Tide
*Click to enlarge images

Based on Figure A open gusher C and D first. If both gushers are high then the Goldie is in either B, G, E or F.

Based on Figure B if gusher C is low and D and G are high then the Goldie is in A.

Based on Figure C if gushers C and D are both low then the Goldie is in H or I.
High Tide
*Click to enlarge images

Based on Figure D always open gusher F first if it is high then the Goldie is in C.

Based on Figure E if gusher F is low then the Goldie is in A, B or G.
General Tips
- Goldie Seeking is a Hot & Cold Mini-game where High Gushers mean you are close to a Goldie and Low Gushers mean you are far.
- Start searching for the Goldie immediately, when there’s any downtime. Not looking for the Goldie quickly enough is one of the main reasons quota fails happen during Goldie seeking. Long range weapons should prioritise searching for the Goldie as they can open gushers from afar which saves valuable time.
- When searching for the Goldie, try and memorise the patterns that we have suggested below.
- Rollers can be used in front of the Goldie to extract more eggs. Hold ZR and move your stick left and right slowly, especially strong with Dynamo and Flingza rollers. See: Roller Strategy by Marty
- Common practice in Goldie Seeking is to open gushers alone so if you are in a squad the team should split up and after opening the first gusher the player should use “This Way!” if the gusher is high or “Booyah!” if the gusher is low so teammates on opposite sides can open their gushers. In Freelance this usually isn’t possible unless you are teamed with experienced players. So you will have to rely on yourself and some good luck.
- To learn Goldie Seeking strategies in a more interactive way visit Gungee’s awesome Salmon Learn website (Splatoon 2 maps only at the moment).
Avoid
- Do not open gushers when the Goldie has already been found.
- If gushers around you are low that indicates the Goldie is further away so do not open more gushers in that area.
- Do not ignore lessers.
Goldie Rush
Map Specific
- Make sure you paint all the tall walls connected to the basket platform. If you think you’re going to get overwhelmed, cling to the wall for a short while until all the Chums move away from the basket.
- The most difficult High Tide Goldie Rush map due to the basket platform being so small and if Chum get through it is easy to get knocked off. Wall clinging for temporary relief is possible but much more difficult to execute. Specials and co-ordination are very important here. Try and alternate specials if possible so all are used effectively.
*Click to enlarge images

For safe positioning, weapons with a fast fire-rate and good DPS should be in this position with slower weapons on the platform. This is the safest way to play this wave. See Figure A

A useful strategy to maximise eggs by pushing up and splatting Chums early, while letting players at the basket splat the Goldie. See Figure B
General Tips
- Be aggressive and keep shooting the incoming lines of Salmonids when you know you can. The moment the team stops their offensive pressure, the Chums and Goldies can easily overwhelm you and cause a team wipe very quickly. It’s very important to splat the Goldies especially if you have a high DPS weapon.
- If you have aggro (Glowflies on you) and you’re noticing that you won’t be able to take out the enemies coming at you alone, Jump onto a nearby painted wall to buy time for yourself and your team to survive, and get eggs in. Especially useful in emergencies and if there is an abundance of eggs.
- Rush Wave has fixed intervals similar to a normal shift when a new wave of Salmonids / Chums spawn, that depends on your Hazard Level – this is also the same interval that changes the glowflies on the targeted player! Learning these intervals will help you prevent getting surprised! Chart by Minaraii
- Goldies spawn for every 20 NEW CHUMS Spawned – this is very important to know so if you and your co-workers don’t splat enough Chums, no new Goldies will spawn.
- Roller type weapons should stay near the basket and keep rolling forward slowly to create a wall of defense for the team. This takes out all incoming chums and slows down/weakens Goldies for teammates to finish them off. If you have Dynamo, roll slowly to be ink efficient. Stop moving but continue to hold ZR to refill your ink.
- Splat and Tenta Brella users should launch their shield as much as possible to create a similar defensive wall effect, though slightly more limited.
- Chargers deal piercing damage so shooting in straight lines can deal good damage. Except for Snipewriter and Bamboozler
- To maximise damage spread from Sloshers, arch your shots a little higher to deal damage using the full range of the sloshes.
- IMPORTANT: Specials. Wave Breaker is very useful in filtering Chum and reviving teammates. Inkjet is the best special in this mode especially when you are down 1-3 teammates.It is wise to use Inkjet if you are being targeted so you can move the horde away from an area to allow teammates to run eggs safely while you shoot the horde. Booyah Bomb is very useful at allowing you to stay safe, revive teammates and clear an area. Use your Specials to help compensate for the lack of dps when teammates are down. Be careful when using Reef Slider with the Glowflies on you, it is highly probable you will be splatted. Crab Tank is very strong in turret mode and it is possible to roll some Chum but be careful you don’t get splatted when doing this. Killer Wail and Triple Inkstrike are not the best for this wave but if situations are dire then special usage is better than no special usage.
Avoid
- If eggs fall to the far from basket it is often best to ignore them as teammates can get overwhelmed with one less player or the Glowflies could switch to you and get you splatted.
- Wall clinging should only be used if the Glowflies are targeting you and there are many eggs which the team are struggling to run. It allows them time to run eggs safely and can buy some time to revive splatted teammates. Keep in mind that after wall clinging there is large pile up of Chums/Goldies now. Wall clinging for too long will cause Chums to jump up and splat you instantly.
Cohock Charge
Map Specific
- One of the easier Cohock Charge maps. It is easiest to use the cannons to the left and right of the basket as they are pretty safe. The back cannon should only be used if you aren’t able to access either of the other 2 or if basket gets crowded.
- If you are one of the egg runners and see mobile bosses approaching, hang back a little and let your cannon users splat them closer to basket. This map is quite large and it may become difficult to meet quota otherwise.
General Tips
- Make sure at least one person is in a cannon at all times. If no one is in a cannon to shoot the incoming waves of Cohocks, the basket will get overwhelmed extremely quickly.
- Prioritise Stingers, Flyfish and Big Shots. These bosses have a habit of targeting players in cannons and pinning them down, effectively disabling the use of the cannons altogether. Once the cannons are unusable, the wave is usually lost.
- A cannon shot can OHKO a Flyfish if you shoot right above the pilot. Otherwise you don’t have to be perfectly accurate when dismantling a Flyfish. See this demonstration by Nick
- Cannons can also OHKO Fish Sticks before they land. See this demonstration by Reyko
- When luring bosses if you are inside a cannon or on the map try and damage/splat Cohocks while you wait. However be wary of stunning Scrappers and slowing down the luring too much. If the basket area is getting overwhelmed then ignore luring until it is relatively clear.
- Egg runners should be aware of Maws and Drizzler torpedoes so cannon users are protected. If egg runners see mobile bosses spawn you can wait and let them come closer.
- Often it can be difficult to see a Maws approaching while in cannons so it is important to listen out for the sound that Maws makes as it approaches, jump out of the cannon until you find out who it is targeting. As an egg runner if you see a Maws targeting a cannon user try and splat the Maws with a splat bomb throw and then revive the player after.
- You may have to give up on cannons to help run eggs if your egg runners are overstaying at the spawns.
Avoid
- If someone is already in cannons do not waste time by fighting over the cannons instead play your role as an egg runner. If you do take up a cannon do not constantly leave the cannon and let bosses and Cohocks pile up.
- As an egg runner do not guard far eggs or spend too much time far away from the basket as this slows down lures and can cause problems meeting quota.
- Cannon users should avoid splatting mobile bosses far from basket if possible.
Mothership
Map Specific
Normal Tide
- Normal Tide Mothership does not have a large density of spawns anywhere really. A long range weapon can stay on the tower and help splat far Chinooks to help reduce the amount of lessers they will spew. Be sure to throw in some eggs too and not just splatting Chinook’s the whole time.
- The tower area can also be used for long range weapons and specials to shoot additional containers from the Mothership when it is at basket, very easy to practice with Explosher.
High Tide
- High Tide Mothership has very dense landing points at the overlook and ramps opposite to the basket. The far right of mid and the grate next to the basket also have a good number of landings. Keep an eye on Chinooks there.
- Running eggs from the grates can be time consuming so it may be faster to splat the coolers with a long range weapon, but run closer eggs.
- Snatchers can be a problem here at the base of the overlook ramp as it is very close to the water. Weapons with a fast fire-rate, as well as Rollers or Brellas should take care of these.
Low Tide
- Low Tide Mothership has a good number of Chinooks landing on the hill and at the Normal Tide perch area. Some long range weapons have the potential to intercept Chinooks headed to the Normal Tide area to make their eggs drop closer to the basket.
General Tips
- Keep running eggs! In less experienced groups, if even a single player isn’t running eggs consistently, meeting the egg quota can become very difficult. It can become easy for players with longer range to get into a habit of doing nothing but shooting down coolers. This is only effective in very specific scenarios.
- Split your team up to different parts of the map, to maximise the amount of coolers and eggs the team can handle. If one area isn’t covered by any player, coolers will start to pile up in that area which can cause issues.
- Some blasters and the explosher can either clip the top of the Mothership or arch their shots on top of the Mothership for extra eggs when it is at basket.
- When the Mothership is departing the basket, if your weapon has enough range, you can aim at the highest point in the centre to shoot a few more coolers.
- Eggs come from splatting the Chinook and not the cooler itself, this can be useful when you are slightly late to a cooler.
- Try to take out the nearby coolers first and leave the far coolers alone. This way, more coolers will spawn closer to basket => less timing running far eggs.
- Specials: you can use Crab Tank turret mode to deal huge damage to the ship and cooler bunch at the end. Triple Inkstrike and Killer Wail are fair options, but make sure to use it before the Ship is repelled to get the cooler bunch.
- Note: the Mothership will attach to basket in two passes: about 65 seconds left and 15 seconds left. Make sure you are near basket to help fend off the Ship.
- Keep and eye out for Snatchers that could possibly help bring far eggs to the basket area.
Avoid
- Do not ignore lessers and let them pile up.
- If coolers are flying towards basket, don’t splat them far away.
Grillers
Map Specific
- Probably the easiest Griller map. If a Griller spawns from the docks or beach area, everyone can stand at the basket and shoot the tail as Grillers turn and pass by the basket. With this method the Griller ends up right next to the basket and the eggs are easily deposited.
- Good cleaner weapons like Blasters, Brellas and Rollers can head down to the basket platform ramp after the stun to clear Smallfry, to prevent them from splatting egg runners and coming up to the basket platform.
Griller Positioning
*Click to enlarge images

If a Griller spawns from the beach, docks or under the grates the targeted player should stand on the platform next to the basket. The others can also stand here and shoot the tail as the Griller comes right next to the basket. One player can go to the slope and splat Smallfry so they don’t bother players who are shooting at the Grillers. See Figure A

If a Griller spawns from the pier the targeted player should move to the bottom of the perch area while the others stay at the basket platform. As the Griller passes by the basket the other players can shoot the Griller easily. If that targeted player stays on the platform next to the basket it can be very difficult to stun the Griller. See Figure B

When the Griller spawns from the pier this shows the angle on how to stun the Griller easily from the basket platform. In Freelance if you are the target it can be safer to lure the Griller the long way by jumping to mid or the overlook ramp. The Griller will take a longer route to basket through mid. See Figure C
General Tips
- It is good to have one cleaner who focuses Smallfry. This typically applies to most Brellas, Rollers, and Sloshers. In large numbers, Smallfries can cause massive problems during Grillers, and can stop your team from getting stuns effectively. Weapons with low damage, or rollers should especially be taking on this role.
- If there are powerful long range weapons like Splatling or charger their job is usually to focus stunning/shooting the Grillers. The other weapons can flex but be sure to help each other if smallfry are overwhelming.
- When using Slosher it is possible to arch your shots over the Griller and deal damage to the tail if you aim correctly.
- If a pile up is occurring or the quota is struggling to be met, specials should be used. Killer Wail is able to target two Grillers, stun them and deal a decent amount of damage or splat them if they are already weakened. Inkjet can be used here and it’s often a good idea to hover over the basket for extra elevation, safety and better angles. Triple Inkstrike and Booyah Bomb both do sufficient damage to Grillers enabling them to be stunned and weakened. Reef Slider can go through Grillers and cause a quick burst of damage but be mindful of where you start the Special and where you will end up as you might get splatted by either the Grillers or Smallfry. When using the turret mode of the Crab Tank, ensure the Grillers are not targeting you and that you are somewhere safe, ideally on top of the tower, so as to get maximum use out of the Special. Wave Breaker is very good for dealing with Smallfry but be mindful where you place it as the Grillers can destroy it.
- Grillers can be lured away from basket to give players some time to collects eggs or clear Smallfry. This can also be used if players are getting splatted to give others time to revive them so they don’t get overwhelmed.
- Always know where the Grillers are. Watch the red laser and who the Griller is targeting. This lets you know where the Griller plans to go, and allows you to avoid its path accordingly. If you lose track of where a Griller is, there’s a decent chance it’ll blindside you and take you out.
- Keep stunning the Grillers! Don’t let up on the aggression towards the Griller tails and consistently shoot them. If a single Griller gets out of control on high tide, a team wipe or quota failure becomes extremely likely.
Avoid
- Don’t be too erratic with your movement causing the Grillers to splat your teammates. It is possible to wall cling temporarily to buy some time in certain situations.
- Do not ignore Smallfry especially if you have the strongest weapon for dealing with them.
- When shooting the Grillers try to avoid body blocking each other’s shots by strafing or moving too much.
- Don’t wall cling for too long as Smallfry can splat you and by doing so there is one less player contributing to splatting Smallfry/Grillers.
Fog
Map Specific
- Goldie lures are fairly easy during Normal Tide. If you find a Goldie that’s managed to make it near basket try to lure it if you have time. Alternatively splat it there if there are other bosses to worry about, that’s already close enough to help you get the quota.
- Goldie lures can be difficult during High Tide. Due to the small size of the map and the sheer amount of Salmonids that will spawn sometimes it can be more dangerous to wait and lure a Goldie and letting bosses pile up.
- Goldie lures are fairly easy during Low Tide. The map layout is large so if a Goldie spawns from one area you can focus another area as it approaches. Avoid splatting the Goldie in the narrow paths as running these eggs can be risky and you will most likely stall other bosses approaching from these areas.
General Tips
- Functions very much the same as regular Normal, High and Low Tides just with the addition of Goldies which should be lured to the basket. Try and identify them early and work on the lure while also being proactive with boss or lesser splats.
- Goldies drop random amount of eggs when splatted that can range from just one, five or ten.
- If you move close to the Goldie you can make it switch targets to you to help the luring process.
- If the game is getting out of hand then don’t worry about luring Goldies and focus on quota and boss management instead.
- As vision is impaired be on the lookout for Stingers, Flyfish and Drizzler torpedoes. Always check these spawn locations to confirm. Use “This Way” if you need help.
Avoid
- Do not splat Goldies far from the basket, lure them at all times unless there is a snowball.
- If teammates are stalling bosses far away and there is no opportunity to lure them help splatting the bosses and avoid being inactive or spamming “This Way!”.
- Don’t all bunch together in one area as you may miss lures or risk a snowball from the opposite side. Long range or low DPS weapons can stay near the basket.
Mudmouth
Map Specific
- A few Mudmouths spawn near basket so be sure monitor lesser control here by focusing lessers if your weapon is good in this role which can allow your teammates to splat the Mudmouths quicker or prioritise these Mudmouths as soon as possible.
General Tips
- An easy mode to pass, just throw 3 Splat Bombs inside the Mudmouth’s mouth to splat the Mudmouth and receive up to 6 eggs from it. Green Mudmouths will spew Smallfry or Chum and gold Mudmouths will spew Cohocks.
- Important for powerful weapons to clear Cohocks: For example, the Dynamo can just stand in front of a Mudmouth and roll lessers with ease allowing teammates to throw bombs.
- Explosher can slosh into the base of the mouth and it will have the same effect as bombs. See this demonstration by Reyko
- A charged attack with the Grizzco Splatana can damage Mudmouths.
- Crab Tank and Inkjet shots aimed inside the Mudmouth can also have the same effect as throwing bombs. Killer Wail, Triple Inkstrike and Booyah Bomb can splat Mudmouths.
- Think of this wave as a race. You want Mudmouths to spawn near basket as many times as possible. So if you see a far Mudmouth spawn and your team is collecting eggs, go to the far Mudmouth and splat it safely.
Avoid
- As this is a relatively straight forward wave type you may be better served saving your Specials for other waves if it isn’t wave 3.
- If Mudmouths spawn far away from basket but then after you splat one, more spawn near basket it may be best to leave those far eggs and splat the closer Mudmouths and deposit those eggs.
Tornado
Map Specific
- If the egg box spawns on the left side of the map you want to throw your eggs in the middle of the low tide basket area, then up to the perch area. See Example
- If the egg box spawns on the right side of the map you want to throw your eggs in the middle of the low tide basket area, then up to the perch area See Example
Credit to Gungee for the Map Tool.
General Tips
- Another very simple mode; after popping the egg box it is easier if 3 teammates throw eggs into the middle area of the map and 1 person (can be high dps or mobile weapon) picks up and throws those eggs closer to the basket.
- Lessers will drop down from the sky, usually on top of the 1 person in the middle (They drop in a wide area with the low tide basket as the center). That player should stay mobile while shooting the lessers so they don’t get splatted easily.
- At this point, 1-2 teammates that were throwing the eggs from the box should move into the middle and help with throwing eggs closer to the basket and splatting lessers.
- A good mode to practice Squid Roll to pick up eggs quicker and provide a little extra distance because of the roll to throw the eggs a little further.
- Another tip is to “Always keep moving and think of ways to use your ink efficiently while balancing egg throws and lesser control.”
- Lessers will drop down in three waves: once at the start of the wave around the first crate and then twice around the area where the low tide basket usually is.
Avoid
- If you have a weapon that can deal with lessers easily then try not to only run eggs but also work on lesser control.
- When lessers fall from the sky do not be static when firing your weapon, as you will most likely get splatted. Try and be mobile and shoot/run eggs.